Posted on — Leave a comment

Protect Pontoon Furniture From Winter Damage

Table of Contents

Last Updated: September 25, 2026

Winter storage can make or break your pontoon investment. Furniture that looked pristine in September turns moldy, cracked, and sun-damaged by spring if you don’t protect pontoon furniture from winter damage properly. The good news: most damage is preventable with the right approach and materials.

This guide walks you through the specific steps to safeguard your boat’s interior during the off-season. The process is more straightforward than you’d think.

Clean Vinyl Upholstery Before Storage

Start here. Dirt, algae, and salt residue left on vinyl upholstery trap moisture and accelerate deterioration. A thorough cleaning before storage prevents mold spores from taking root in your boat seats and cushions.

Use a marine-grade vinyl cleaner mixed with water per product instructions. Scrub all seating surfaces with a soft brush, paying special attention to seams and crevices. Rinse thoroughly with fresh water and let dry completely in the sun for at least 4-6 hours before covering your boat.

Don’t skip this step thinking a cover will protect dirty upholstery. Moisture trapped under a cover creates the perfect breeding ground for mildew. Clean vinyl gives you a fighting chance during long storage periods.

Pro TipWipe down the helm console and any hard plastic surfaces too. Salt spray residue corrodes electronics and fades finishes faster than you’d expect.

Apply Marine Vinyl Protectant for Winter

Once vinyl is clean and dry, apply a UV protectant formulated for marine environments. Apply per product directions (typically spray or wipe-on), working in sections and buffing with a microfiber cloth. Reapply every 6-12 months for maximum protection.

Key TakeawayMarine vinyl protectant isn’t optional if you want your boat seats to look new in five years. The cost is minimal compared to replacing furniture.

Choose the Right Boat Cover Material and Support System

Canvas covers offer superior durability and breathability compared to synthetic tarps. Breathable fabric allows moisture underneath to escape, preventing condensation buildup that causes mildew. Marine-grade canvas costs more upfront but lasts longer and protects better.

Article image

Close-up of a pontoon boat covered with a breathable canvas cover supported by aluminum arch supports, showing water shedding off the elevated cover with no pooling visible underneath

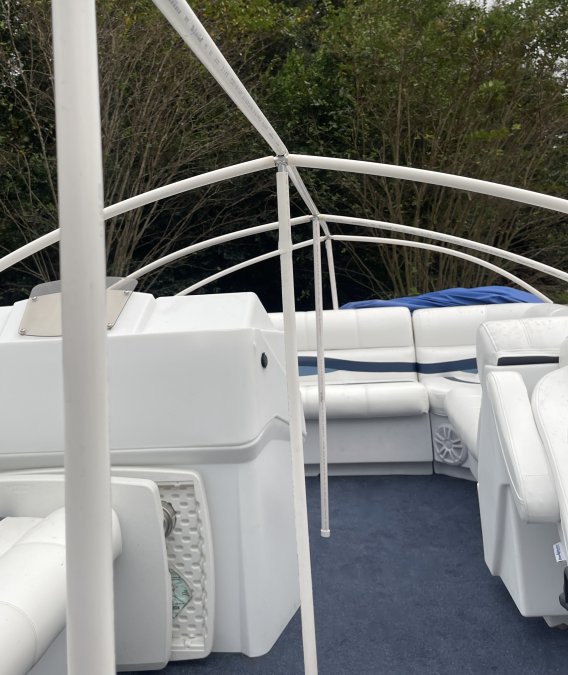
Equally important: your support system. A sagging cover pools water, which drains into boat seats and creates standing moisture. A proper support frame keeps your cover elevated and taut, preventing water collection and ensuring air circulation underneath.

Shrink-Wrap vs. Canvas: Which Works Best

Shrink-wrap creates an airtight seal, trapping condensation inside and risking mold damage. Canvas covers breathe, shedding water while allowing moisture to evaporate. For winter storage lasting 4-6 months or longer, breathable canvas is the smarter choice for protecting pontoon furniture from winter damage.

Building a Support Frame to Prevent Water Pooling

A sagging cover pools water and allows it to seep into seams and reach your furniture. Build a proper support frame with poles spaced 3-4 feet apart to create a dome shape that sheds water. Combined with a floor-supported system that sits on the pontoon deck, you have a strong, reliable solution to keep your pontoon boat dry and secured.

Prevent Mold on Boat Seats With Moisture Control

Prevent mold on boat seats with active moisture management: ensure ventilation by leaving small gaps at cover edges or installing vent ports, use desiccant packs inside the cabin (replace every 4-6 weeks), and inspect every 4-8 weeks for condensation or visible mold. Catching mold early prevents it from spreading to upholstery.

Manage Ventilation and Condensation During Winter

Condensation forms when warm interior air meets cold exterior air. The severity of condensation risk depends heavily on your regional climate, so a one-size-fits-all ventilation strategy won’t work.

How Climate Affects Condensation Risk

Humid coastal regions: High ambient humidity requires active airflow and dehumidification. Cold, dry northern climates: Freeze-thaw cycles create condensation; focus on preventing temperature swaps. Moderate inland climates: Adjust ventilation seasonally as moisture profiles change.

Ventilation Strategy for Your Climate

For humid coastal storage: Install vent ports on opposite sides (bow and stern), spaced 6+ feet apart. Leave cover edges loose (2-3 inches gap) for continuous air escape. Run a portable dehumidifier targeting humidity below 60%, checking every 2-4 weeks. Place desiccant packs throughout the cabin, replacing every 4-6 weeks. Solar-powered fans are also a great choice.

For cold, dry northern storage: Install vent ports and open the cover on mild days (40°F+) to release warm interior air.

Shop all Products →

Monitor Humidity Levels Actively

Invest in a basic humidity meter ($15-30) and check levels every 2-4 weeks. Target below 60% humidity; above 65% requires increased ventilation or dehumidification. Below 40% is acceptable, focus on preventing freeze-thaw condensation instead.

Ventilation Setup: Practical Installation

Stick-on vent ports: Clean cabin exterior, apply adhesive-backed ports on opposite sides 6+ feet apart, press firmly. Cost: $20-40. Through-hull fittings: Drill 1.5-inch hole, install stainless steel fitting with seacock. Cost: $50-100 plus installation. Cover gap ventilation: Leave 2-3 inch gaps at bow and stern for natural convection.

What to Do If Condensation Appears

If you find heavy condensation: wipe down immediately, increase ventilation, run a dehumidifier for 2-3 weeks, check for mold and treat with 10:1 water-to-bleach solution, and inspect the cover for tears. Persistent condensation despite ventilation indicates either a climate mismatch or cover failure.

Pro TipIf you live in a humid coastal area and can’t run a dehumidifier year-round, consider storing your boat in a climate-controlled facility for the winter. The cost ($50-150/month) is often worth it compared to replacing mold-damaged upholstery ($2,000+).

Stop Rodents and Pests From Damaging Your Pontoon

Rodents can destroy cushions, chew wiring, and contaminate your boat in a single winter. Pest damage is entirely preventable with a multi-layered approach.

Seal Entry Points Before Covering Your Boat

Rodents enter through openings as small as a dime. Seal entry points: through-hull fittings, cable penetrations (wrap with steel wool then seal), ventilation openings (install 1/4-inch hardware cloth), seams and cracks, and propane lockers. Use marine-grade sealant combined with steel wool for a permanent barrier.

Remove All Food and Organic Material

Remove all food, snacks, and beverage containers. Empty trash cans and wipe surfaces. Check under cushions and behind panels for forgotten food. Remove organic materials (paper, cardboard, fabric scraps) that rodents use for nesting. Inspect insulation for damage and replace if needed.

Install and Monitor Rodent Traps Strategically

Place traps on the dock near your boat and along the perimeter on the ground. Use snap traps (bait with peanut butter or nesting material) or electronic traps. Do not use loose poison pellets inside the boat. Check traps every 2-4 weeks and rebait if needed.

Use Deterrents as a Secondary Layer

Use deterrents in combination with sealing and traps: ultrasonic devices (place inside cabin and near exterior), peppermint oil or ammonia-soaked cotton balls (replace every 4-6 weeks), or predator urine (spray around perimeter). These are inexpensive but should not replace physical barriers and traps.

Inspect for Pest Activity During Off-Season Checks

During your regular maintenance visits (every 4-8 weeks), spend 5 minutes checking for pest signs:

  • Droppings: Fresh droppings are dark and moist; old droppings are gray and crumbly. Location indicates where rodents are active.
  • Chewed material: Look for bite marks on cushions, wiring insulation, or wooden trim.
  • Nesting material: Shredded paper, fabric, or insulation indicates active nesting.
  • Grease marks: Rodents leave dark smudges along walls and beams as they travel.
  • Odor: A musty or ammonia-like smell suggests active rodent presence.
Watch OutIf you discover significant rodent damage to upholstery or wiring, document it with photos for your insurance claim. Rodent damage is often covered under homeowners or boat insurance policies if the boat is stored at your residence.

Common Winter Storage Mistakes to Avoid

The biggest mistake is skipping the cleaning step. Dirty upholstery plus moisture equals mold. No shortcut around this.

Off-Season Maintenance Checks for Pontoon Furniture

Schedule maintenance checks every 4-8 weeks during winter storage. These don’t need to be lengthy, 30 minutes per visit is enough.

Maintenance Task

Frequency

What to Look For

Cover inspection

Every 4-8 weeks

Tears, sagging, pooled water

Condensation check

Every 4-8 weeks

Moisture on windows and upholstery

Mold inspection

Every 4-8 weeks

Visible growth on seats or cabin

Pest monitoring

Every 2-4 weeks

Droppings, chewed material, traps triggered

Support frame check

Every 8-12 weeks

Rust, bending, loose fasteners

Humidity monitoring

Monthly

Levels above 60% indicate ventilation issues


Frequently Asked Questions

What’s the best way to prevent mold on boat seats during winter storage?

Start by cleaning vinyl upholstery thoroughly with a marine-grade cleaner, then apply a vinyl protectant. The key is moisture control: use a breathable storage cover, install support poles to prevent water pooling, and ensure ventilation around the boat. Check seats weekly during storage to catch condensation early. Mold spores thrive in damp, stagnant environments, so air circulation is critical. Consider placing moisture-absorbing materials like desiccant packets inside cushioned areas to wick away excess humidity.

Should I remove pontoon cushions for winter storage?

Removing cushions is the safest approach if you have secure indoor storage space. Cushions are vulnerable to mold, UV damage, and moisture absorption. If you must leave them on the boat, ensure they’re completely dry, apply a vinyl protectant, and use a support frame that elevates your storage cover to prevent water pooling on surfaces. Removable cushions should be stored indoors in a climate-controlled space, away from direct sunlight and humidity. This prevents long-term storage damage and extends upholstery life significantly.

Is it necessary to use a support system under a pontoon boat cover?

Yes, a Pontoon Boat ULTIMATE Canvas Solution support system is essential for winter storage. Without one, snow load and standing water create dangerous pooling, which damages your canvas cover, promotes mold growth, and stresses the boat’s frame. A Pontoon Boat Canvas Solution cover support system keeps the cover elevated and taut, allowing water and snow to shed properly. This preventative maintenance protects your furniture, reduces mold spores, and extends cover life. Support poles with arch-style frames distribute weight evenly and prevent the sagging that leads to moisture accumulation.

Can I use Armor All on my boat seats during winter?

Armor All is designed for automotive interiors and isn’t formulated for marine vinyl or the specific demands of winter storage. Marine vinyl protectants are engineered to resist salt air, UV exposure, and moisture—conditions Armor All doesn’t address. Use a marine-grade vinyl conditioner or UV protectant specifically rated for boat upholstery. These products provide better water shedding, mildew prevention, and durability in harsh marine environments. Apply your chosen marine protectant before covering your boat for winter.

c
Posted on — Leave a comment

Why Avoid Drilling Pontoon Boat Rails

Table of Contents

Last Updated: September 20, 2026

Why Drilling Pontoon Boat Rails Causes Permanent Damage

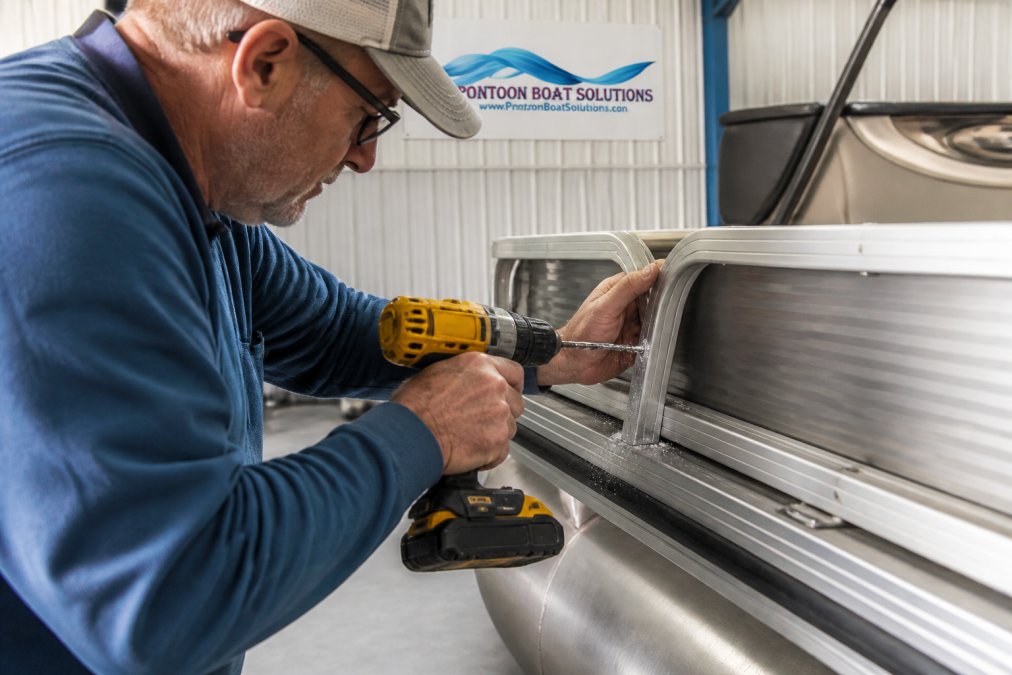
Drilling into pontoon boat rails creates irreversible structural damage that compromises the integrity of your investment. When you penetrate the aluminum extrusion, you bypass the factory-applied protective layers and expose the material to water intrusion. This isn’t a minor cosmetic issue, it’s the beginning of a cascade of failures that affects everything from the boat’s resale value to the safety of your furniture and equipment.

Once a drill bit penetrates the powder coating and anodized surface, water enters the hollow aluminum extrusion and becomes trapped. Seasonal temperature fluctuations cause this water to expand and contract, creating cumulative stress.

How water intrusion compromises aluminum integrity

Moisture entering through a drilled hole travels along the internal cavity and becomes trapped, creating conditions for corrosion.

The factory finish seals aluminum and prevents oxidation. Once broken by drilling, exposed aluminum oxidizes immediately, accelerating in marine environments. The white powdery residue is aluminum oxide, indicating the structural material is weakening.

Trapped water promotes mold and mildew growth, causing canvas covers, cushions, and upholstery to deteriorate faster from moisture-laden air escaping compromised rails.

Galvanic corrosion mechanics in marine environments

Galvanic corrosion occurs when two different metals contact in an electrolyte like saltwater. Drilling aluminum rails and installing stainless steel fasteners creates a galvanic couple where aluminum acts as the sacrificial metal, corroding to protect the steel.

This reaction accelerates in saltwater and occurs even in freshwater with minerals or road salt exposure. Electrons flow from the aluminum anode to the steel cathode, causing the aluminum to gradually dissolve.

Corrosion creates localized pitting that weakens the rail at the stress point of drilling, hidden inside the hollow rail where it develops unseen.

Galvanic Corrosion and Long-Term Structural Failure

Stainless steel fasteners, though considered safe for marine use, accelerate corrosion in aluminum pontoon rails through galvanic action, even in freshwater and severely in saltwater.

Diagram illustrating galvanic corrosion and structural failure caused by drilling pontoon boat rails

Why stainless steel fasteners accelerate oxidation

Stainless steel sits much higher on the galvanic scale than aluminum. In electrical contact, aluminum becomes the sacrificial metal as electrons flow to the steel, causing oxidation.

Corrosion accelerates with moisture and salt. Even freshwater storage shows measurable corrosion around stainless steel fasteners in a single season, increasing with salinity and temperature.

Pitting around the fastener hole creates stress concentrators that reduce load-bearing capacity by 20-30 percent or more, even when the rail appears sound.

Vibration fatigue and stress cracks from drilling

Rails experience constant vibration from waves, motor operation, and wind. They’re designed to handle these vibrations only if the structure remains intact.

Drilling creates a stress concentration point where vibration amplifies, leading to fatigue cracks that propagate over weeks or months of normal use.

Fatigue cracks start at the inside edge of drilled holes where stress is highest and invisible. They grow silently until reaching critical length, causing sudden failure under load. This is why drilling pontoon boat rails is particularly dangerous, failure is unpredictable and can occur during use.

Warranty Voidance and Resale Value Impact

Drilling voids the manufacturer’s warranty on rail components. Most manufacturers explicitly prohibit owner-initiated modifications to structural components, voiding coverage for related damage.

Why Avoid Drilling Pontoon Boat Rails

Warranty voidance leaves you responsible for full replacement costs if drilling causes failure. Rail replacement can cost thousands of dollars depending on boat size.

Resale value can drop when buyers discover drilled holes, signaling water intrusion and structural compromise.

No Drill Pontoon Accessories: Proven Alternatives

The market for non-invasive pontoon accessories has expanded significantly because boat owners recognize the risks of drilling. These alternatives deliver the functionality you need without compromising the structural integrity of your rails.

Shop all Products →

Clamp-on mounts and non-invasive installation

Clamp-on mounts work by gripping the rail extrusion without penetrating it. The clamping force distributes pressure across a wider surface area of the rail, which reduces stress concentration compared to a fastener that loads a single point. Quality clamp-on systems use rubber or plastic pads to protect the powder coating and prevent galvanic contact between the mount and the aluminum.

Installation takes minutes without tools after the first installation. You slide the clamp onto the rail, position it where you need it, and connect the supporting pieces to form the domes. The Pontoon Boat Canvas Solutions systems can be repositioned or removed without leaving any permanent marks. This reversibility is crucial for maintaining your boat’s resale value and keeping your warranty intact.

The load-bearing capacity of the Arch-Makers and center supports mounts depends on how you space your canvas solution. Well-engineered and spaced systems can support canvas cover support structures. Additional products like fishing rod holders, and light-to-medium accessories slide on the rail without issue.

Floor-supported systems and weight distribution

Floor-supported systems compliment the rail mounting system by placing support structures on the boat’s floor such as the Pontoon Boat Cooler Solution. These systems use vertical supports that rest on the deck or rub rails.

This approach offers several advantages. Weight is distributed across the entire floor area rather than concentrated at rail attachment points.

Pontoon Boat Rail Corrosion Prevention Best Practices

Even if you avoid drilling, your pontoon rails still need protection from the marine environment. Saltwater, UV exposure, and temperature fluctuations all contribute to corrosion and degradation of the powder coating.

Protecting powder coating and factory finish

The powder coating on your rails is a barrier between the aluminum and the corrosive environment. Once that barrier is compromised, whether through drilling, scratches, or UV degradation, corrosion accelerates. Protecting the powder coating is the most cost-effective way to prevent long-term damage.

Sealant application and seasonal maintenance

Applying a marine-grade sealant to exposed aluminum surfaces creates an additional protective layer. Sealants fill micro-cracks in the powder coating and prevent water from reaching the aluminum beneath. Reapply sealant annually or after heavy use in saltwater environments.

Repairing Stripped Screw Holes in Pontoon Rails

If your pontoon already has drilled holes from previous modifications, repair becomes necessary to prevent further deterioration. The goal is to seal the hole and prevent water intrusion while maintaining as much structural integrity as possible.

Epoxy repair methods for existing damage

Epoxy fills drilled holes and hardens into a solid mass that restores some structural integrity to the compromised section. Clean the hole thoroughly with a wire brush to remove any corrosion or debris. Dry the area completely, epoxy doesn’t cure properly in the presence of moisture.

When to replace versus repair compromised sections

Small holes (under 0.5 inches diameter) are good candidates for epoxy repair. Larger holes, multiple holes in the same rail section, or holes showing signs of advanced corrosion should prompt consideration of rail replacement. A rail section with severe pitting or structural cracks is no longer safe for load-bearing applications and should be professionally replaced.

Drilling vs. Non-Invasive Installation: A Practical Comparison

The choice between drilling and non-invasive alternatives comes down to functional requirements, long-term costs, and your commitment to preserving your boat’s value and structural integrity.

Factor

Drilling

Non-Invasive Alternatives

Installation Time

30-60 minutes

15-30 minutes

Structural Risk

High

None

Water Intrusion Risk

Immediate

Zero

Warranty Impact

Voidance

No impact

Resale Value

Reduces 10-15%

No reduction

Maintenance Requirements

Ongoing corrosion management

Minimal

Load Capacity

Variable by fastener

Excellent with proper design

Reversibility

Permanent

Fully reversible

Installation time, ease of use, and customization options

Drilling requires precise measurements, the right drill bit size, and careful technique to avoid damaging internal components of the rail. Non-invasive slide-on systems skip these steps entirely. You position the Arch-Maker, slide it on, and you’re done. The simplicity translates directly to fewer installation mistakes and faster completion.

Load-bearing capacity and structural performance

Properly engineered products can handle substantial loads when the product is adequate and the contact surface is sufficient. The key difference from drilling is that the load is distributed across the rail’s outer surface rather than concentrated at a single fastener point. This distribution actually makes the dome systems more efficient at handling certain types of loads.


Frequently Asked Questions

Why is drilling into pontoon boat rails considered a bad idea?

Drilling creates entry points for water intrusion, which triggers galvanic corrosion when dissimilar metals (aluminum rails and stainless steel fasteners) interact in a marine environment. This corrosion weakens the structural integrity of your aluminum railing, leads to stress cracks, and can compromise the seaworthiness of your boat. Additionally, drilling voids most manufacturer warranties and permanently damages the factory finish, reducing resale value.

Can drilling into aluminum rails lead to galvanic corrosion?

Yes. Aluminum railings are highly susceptible to galvanic corrosion when exposed to saltwater or freshwater environments. When you drill and install stainless steel fasteners, you create a galvanic couple—two dissimilar metals in contact with an electrolyte (water). This triggers a chemical reaction that corrodes the aluminum much faster than natural oxidation. The corrosion spreads outward from the drilled hole, weakening the entire rail section over time.

How do no drill pontoon accessories compare to traditional drilling methods?

No drill pontoon accessories, such as channel mounts and floor-supported systems, eliminate water intrusion, galvanic corrosion, and structural damage entirely. They install without fasteners, preserve your factory finish, maintain your warranty, and protect your resale value. Installation is DIY friendly. Traditional drilling offers lower upfront cost but introduces permanent damage, ongoing maintenance costs, and warranty voidance—making non-invasive solutions more cost-effective long-term.

What should I do if my pontoon rails already have stripped screw holes?

Stripped screw holes can be repaired using epoxy-based fillers designed for marine aluminum. Clean the damaged area, apply marine-grade epoxy into the hole, and allow it to cure fully before re-drilling if necessary. For severe damage affecting multiple holes or structural sections, replacement of the damaged rail section is more reliable than repeated repairs. Prevent future issues by switching to no drill mounting solutions that eliminate the need for additional fasteners.